Table of Contents
- Fire starting
-
- Friction-based methods, such as fire plough, bow drill, hand drill, and fire saw.
- Using a lens or magnifying glass to focus the sun’s rays onto dry tinder.
- Striking metal against metal to create sparks, also known as flint and steel.
- Chemical reactions, such as using battery acid and steel wool or a magnesium fire starter.
-
- Water procurement and purification
- Food procurement (hunting, fishing, foraging)
- Shelter construction
- Navigation (without modern tools)
- First aid and basic medical treatment
- Self-defense survival skills
- Clothing and blanket making
- Communication survival skills
- Stress management and mental toughness
- Energy conservation and resource management
- Teamwork and leadership
- Negotiation and conflict resolution
- Problem-solving and critical thinking
- Adaptability and flexibility
- Knowledge of edible plants and toxic substances
- Orienteering and mapping skills
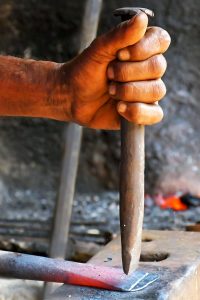
- Basic blacksmithing and metalworking
- Conclusion
In a world where disasters, emergencies, or unexpected events can occur at any time, here are 20 useful survival skills. It’s essential to have a basic understanding of survival skills or you will not survive. These skills can help you survive and stay safe in a variety of situations, such as natural disasters, power outages, or other unforeseen events. From water procurement and purification to shelter construction, hunting, fishing, and foraging, these skills can help you find food, water, and shelter when modern conveniences are not available.
In this era of technology and comfort, it’s important to remember that basic survival skills can be the difference between life and death. In this article, we will cover 20 useful survival skills that can help you prepare for any situation.
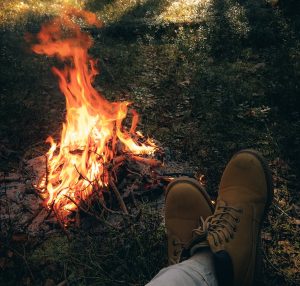
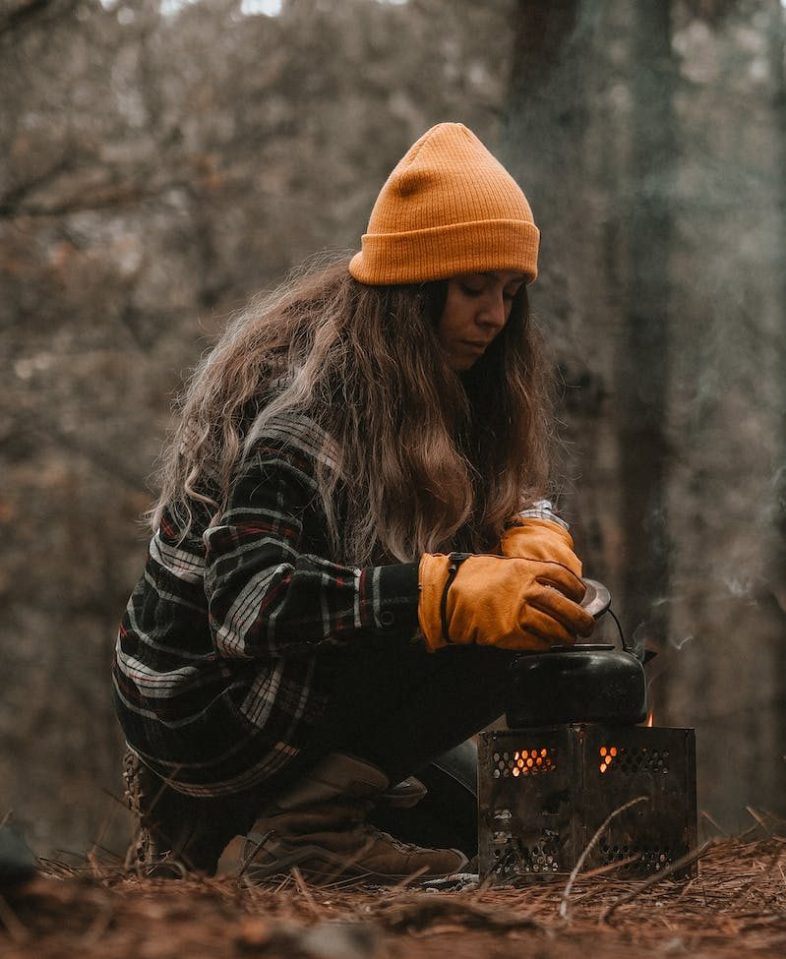
Fire starting
To get fire in a survival situation, you can use several methods:
Friction-based methods, such as fire plough, bow drill, hand drill, and fire saw.
- Fire plough: This method involves rubbing a stick back and forth against a piece of wood to create friction and heat, eventually resulting in a spark that can ignite tinder.
- Bow drill: This method uses a bow to spin a spindle made of wood or other material against a flat piece of wood, creating heat and friction to ignite tinder.
- Hand drill: This method involves using your hands to spin a stick back and forth against a flat piece of wood, generating heat and friction to ignite tinder.
- Fire saw: This method involves using a saw-like motion to rub two pieces of wood against each other, generating heat and friction to ignite tinder.
All of these methods require a lot of time, patience, and practice to master, but they are essential survival skills that can be used in an emergency when other methods of fire-starting are not available. It’s important to have dry tinder and proper kindling on hand to successfully ignite a fire using these methods.
Using a lens or magnifying glass to focus the sun’s rays onto dry tinder.
Using a lens or magnifying glass to focus the sun’s rays onto dry tinder is a method of starting a fire that utilizes the sun’s energy to create heat. The process involves collecting and focusing the sun’s rays onto a single point, which can then be used to ignite tinder.
Here’s how it works:
- Gather materials: You’ll need a lens or magnifying glass, dry tinder, and a sunny day.
- Position the lens or magnifying glass: Hold the lens or magnifying glass above the tinder and position it so that the sun’s rays are focused onto a single point on the tinder.
- Wait for the tinder to ignite: As the sun’s rays are focused onto the tinder, the heat generated will eventually ignite the tinder.
It’s important to have dry and flammable tinder ready, as well as good weather conditions. A lens or magnifying glass with a high magnification power works best for this method, and a sunny day with clear skies is ideal for maximum sun exposure.
Striking metal against metal to create sparks, also known as flint and steel.
Striking metal against metal to create sparks, also known as flint and steel, is a method of starting a fire that involves striking a piece of metal (flint or other spark-producing material) against a piece of high carbon steel to produce sparks. The sparks then ignite tinder and start a fire.
Here’s how it works:
- Gather materials: You’ll need a piece of flint or other spark-producing material, a piece of high carbon steel (such as a ferro rod), and dry tinder.
- Prepare the tinder: Create a small pile of dry, flammable tinder, such as leaves, twigs, and dry grass, and place it near where you’ll be striking the flint and steel.
- Strike the flint and steel: Hold the flint in one hand and the steel in the other. Strike the steel against the flint in a downward motion to create sparks.
- Ignite the tinder: The sparks will fall onto the tinder and ignite it. Be sure to blow on the tinder gently to help it catch fire.
It’s important to have high quality materials, as well as dry and flammable tinder, to successfully use this method. Flint and steel kits can be purchased at outdoor and survival gear retailers. With practice, you can become skilled in using this method to start a fire in various conditions.
Chemical reactions, such as using battery acid and steel wool or a magnesium fire starter.
Chemical reactions can be used to start a fire in a survival situation. Two common methods are using battery acid and steel wool or a magnesium fire starter.
- Battery acid and steel wool: This method involves using the acid from a dead battery to ignite steel wool. The steel wool acts as a conductor, causing a spark that ignites the tinder.
- Magnesium fire starter: A magnesium fire starter is a small device that contains a piece of magnesium that can be scraped to produce sparks. The sparks ignite a flammable substance, such as petroleum jelly, which in turn ignites the tinder.
Here’s how to use these methods:
- Battery acid and steel wool: Open the battery and pour the acid onto the steel wool. Quickly touch a flame to the steel wool to ignite it.
- Magnesium fire starter: Hold the magnesium fire starter with one hand and scrape the magnesium with a knife or other sharp object to produce sparks. Touch the sparks to the flammable substance on the fire starter, then transfer the flame to the tinder.
Both of these methods produce a quick and intense flame, making them useful in a survival situation. However, it’s important to use caution when using chemicals and to be familiar with the proper safety precautions before attempting to use these methods.
Water procurement and purification
In a survival situation, access to clean and safe drinking water is critical. There are several methods for procuring and purifying water, including:
- Collection: Collecting rainwater, dew, and other forms of precipitation is one way to obtain water. Storing the water in containers will help to keep it clean and free of debris.
- Surface water sources: Rivers, lakes, and streams can be sources of water, but it’s important to purify the water before drinking to remove harmful pathogens and contaminants.
- Groundwater sources: Digging a well or finding a spring can provide access to groundwater. Again, it’s important to purify the water before drinking to ensure its safety.
How to dig a well
Digging a well is a method of accessing groundwater for drinking and other uses. Here’s how to dig a well:
- Choose a site: Look for an area with a high water table and good access to sunlight. Avoid areas with high levels of contamination, such as near septic tanks or industrial sites.
- Determine the depth: The depth of the well will depend on the location and the water table. A professional well driller can provide guidance on the appropriate depth for your area.
- Dig the well: The well can be dug using manual methods, such as a shovel or post hole digger, or with the assistance of a machine, such as a drill rig. As you dig, it’s important to line the well with a casing to prevent collapse and contamination.
- Install a pump: A pump can be used to bring the water to the surface for use. There are several types of pumps, including hand pumps, windmills, and solar-powered pumps.
- Purify the water: The water from the well should be purified before drinking to remove harmful pathogens and contaminants. Boiling, filtering, chemical treatment, or UV light treatment can be used to purify the water.
Digging a well can be a time-consuming and physically demanding task, but it can provide a reliable source of clean and safe drinking water in a survival situation. However, it’s important to follow proper safety procedures and to seek professional guidance when necessary to ensure the well is dug properly and the water is safe to drink.
In a city, there are several sources of water that can be accessed in a survival situation. Here are some common sources of water in the city:
- Tap water: In most cities, tap water is treated and safe to drink. Look for public water fountains, taps in parks, or outdoor spigots on buildings.
- Swimming pools: Although not safe to drink, water from swimming pools can be used for washing or flushing.
- Hot water tanks: Hot water tanks in buildings can be a source of potable water if the water has not been treated with chemicals.
- Rainwater: Rainwater can be collected in containers or other receptacles. Look for gutters, downspouts, or other areas where rainwater collects.
- Natural springs or wells: Some cities have natural springs or wells that can be accessed for drinking water.
- Ice: In colder climates, ice can be melted for drinking water.
It’s important to note that in a survival situation, water from these sources may not be safe to drink and should be treated before consumption. Boiling, filtering, chemical treatment, or UV light treatment can be used to purify water and make it safe to drink. It’s also important to follow any local regulations or restrictions related to water collection and use.
Water Purification methods include:
- Boiling: Boiling water for at least 1 minute will kill most pathogens and make the water safe to drink.
- Filtering: Using a water filter or a clean cloth to strain out contaminants can improve the taste and safety of water.
- Chemical treatment: Adding chemicals, such as iodine or chlorine, to water can kill pathogens and make the water safe to drink.
- UV light treatment: Using a UV light water purification device can kill pathogens in water.
It’s important to use multiple purification methods to ensure the water is safe and free of contaminants. In a survival situation, access to clean and safe drinking water is essential for maintaining good health and hydration.
Food procurement (hunting, fishing, foraging)
Food procurement refers to the methods used to obtain food in a survival situation. There are three main methods: hunting, fishing, and foraging. Here’s a brief explanation of each:
- Hunting: Hunting involves killing and capturing animals for food. Hunting can be done with a variety of tools, such as firearms, traps, snares, and hand-thrown weapons. Hunting requires knowledge of the local environment, animal behavior, and hunting techniques, as well as proper safety precautions.
Hunting with hand-crafted tools and equipment involves using handmade tools to capture or kill animals for food. Here are some common hand-crafted tools and equipment used in hunting:
- Bows and arrows: A bow and arrow can be made from natural materials, such as wood and animal sinew, to hunt small and large game.
- Spears: A spear can be made from a long shaft of wood with a sharpened point, used for hunting or fishing.
- Traps and snares: Traps and snares can be made from natural materials, such as rope or branches, to capture small animals, such as rabbits or squirrels.
- Blowgun: A blowgun can be made from a hollow reed or bamboo, used to shoot small darts for hunting small animals.
- Slingshots: A slingshot can be made from a Y-shaped branch and rubber band, used to shoot stones at small game.
- Tomahawks: A tomahawk can be made from a piece of metal or stone attached to a wooden handle, used for hunting and self-defense.

Hunting with hand-crafted tools requires knowledge of the local environment, animal behavior, and hunting techniques, as well as proper safety precautions. It’s also important to have an understanding of the materials and techniques needed to make the hand-crafted tools and equipment. Hunting with hand-crafted tools and equipment can provide a sustainable source of food in a survival situation, but it should be used responsibly to avoid over-hunting and damaging the local ecosystem.
- Fishing: Fishing involves catching fish for food. Fishing can be done with a variety of tools, such as hooks, lines, nets, and traps. Fishing requires knowledge of the local environment, fish behavior, and fishing techniques, as well as proper safety precautions.
Fishing with hand-crafted tools and equipment involves using handmade tools to catch fish for food. Here are some common hand-crafted tools and equipment used in fishing:
- Fishing line and hooks: A fishing line can be made from natural materials, such as plant fibers or animal sinew, and hooks can be made from bent wire or carved from bone or wood.
- Fishing nets: Fishing nets can be made from natural materials, such as plant fibers or animal sinew, used to capture fish.
- Spears: A spear can be made from a long shaft of wood with a sharpened point, used for fishing or hunting.
- Traps: Fish traps can be made from natural materials, such as bamboo or branches, to capture fish.
- Weirs: Weirs can be made from rocks, branches, or logs, used to channel and trap fish.
Fishing with hand-crafted tools requires knowledge of the local environment, fish behavior, and fishing techniques, as well as proper safety precautions. It’s also important to have an understanding of the materials and techniques needed to make the hand-crafted tools and equipment. Fishing with hand-crafted tools and equipment can provide a sustainable source of food in a survival situation, but it should be used responsibly to avoid over-fishing and damaging the local ecosystem.
- Foraging: Foraging involves gathering wild plants and fruits for food. Foraging requires knowledge of the local environment, plant identification, and foraging techniques, as well as proper safety precautions to avoid consuming toxic plants.
Foraging involves gathering wild plants and fruits for food. When foraging, it’s important to identify edible plants and avoid toxic ones. Here are some tips on what to look for and what not to eat:
- What to look for: When foraging, look for plants that are commonly known to be edible, such as wild berries, mushrooms, nuts, and greens. Look for plants that are abundant, easy to identify, and have a long history of safe use.
- Positive identification: Make sure to positively identify any plant before consuming it. It’s recommended to use a reliable field guide or to seek advice from a knowledgeable local expert.
- Edible parts: Some plants have edible leaves, roots, stems, flowers, or seeds. Some parts of the same plant may be edible, while others may be toxic.
- What not to eat: Avoid plants that are toxic, such as poison ivy, poison oak, or poison sumac. Also, avoid plants with bitter or soapy flavors, milky sap, or spines, prickles, or hairs.
- Preparation: Some plants may need to be prepared in a specific way to make them safe to eat, such as boiling, roasting, or soaking.
It’s important to use caution and to seek professional guidance when necessary when foraging for wild plants and fruits. Improper identification or preparation of plants can lead to serious health consequences. It’s also important to follow ethical and sustainable foraging practices to avoid over-harvesting and damaging the local ecosystem.
Following ethical and sustainable foraging practices is important to protect the local ecosystem and ensure the continued availability of wild plants and fruits for future generations. Here are some guidelines for ethical and sustainable foraging:
- Respect property rights: Only forage on public lands or with permission from the landowner.
- Know the regulations: Be aware of any laws and regulations related to foraging, such as seasonal restrictions or limits on the amount that can be harvested.
- Take only what you need: Harvest only what you need for your immediate use, and leave plenty for wildlife and future harvests.
- Be mindful of threatened or endangered species: Avoid harvesting plants or fruits that are listed as threatened or endangered.
- Practice sustainable harvesting methods: Harvest plants in a way that minimizes damage to the plant and surrounding ecosystem, such as using scissors to snip leaves instead of pulling the entire plant.
- Respect protected areas: Avoid harvesting plants or fruits in protected areas, such as national parks, wildlife refuges, or wilderness areas.
- Don’t spread invasive species: Only harvest plants and fruits that are native to the area, and avoid spreading non-native or invasive species.
- Respect the ecosystem: Minimize impact to the ecosystem by avoiding trampling on vegetation or disturbing wildlife.
By following these guidelines, you can ensure that foraging is an ethical and sustainable activity that benefits both you and the local environment.
In a survival situation, it’s important to have a diverse food procurement strategy, using multiple methods to ensure a steady supply of food. However, it’s important to follow proper safety procedures and to seek professional guidance when necessary to ensure the food is safe to eat and the procurement methods are sustainable.
Long-term food storage is an important aspect of emergency preparedness and survival planning. Here are some tips for storing food for the long-term:
- Choose the right containers: Use containers that are airtight, waterproof, and sturdy enough to withstand long-term storage. Consider using food-grade plastic buckets or metal cans with tight-fitting lids.
- Store in a cool, dry place: Store food in a cool, dry, and dark location to prevent spoilage and preserve freshness. Avoid areas with high humidity or fluctuating temperatures.
- Rotate food regularly: Rotate your food regularly to ensure that it remains fresh and edible. Consider using a “first in, first out” (FIFO) system to ensure that the oldest food is used first.
- Use oxygen absorbers: Oxygen absorbers can help to prevent spoilage and extend the shelf life of food by removing oxygen from the storage container.
- Choose the right foods: Choose foods that have a long shelf life and are resistant to spoilage. This can include items such as canned goods, dried fruits and vegetables, grains, and seeds.
- Label and date your food: Label your food containers with the date of storage, and include a list of the contents of each container. This can help you keep track of what you have stored and when it was stored.
- Consider using a vacuum sealer: A vacuum sealer can help to remove air and moisture from food containers, which can help to extend the shelf life of the food.

By following these tips, you can help to ensure that your long-term food storage is effective and will provide you with the sustenance you need in a survival situation. Remember to regularly check your stored food for signs of spoilage or damage, and replace any food that is past its expiration date.
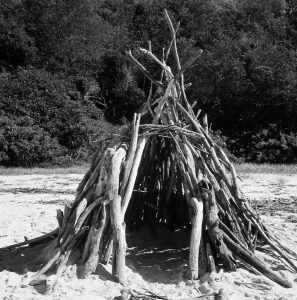
Shelter construction
Shelter construction without modern tools and equipment requires resourcefulness, creativity, and knowledge of natural materials. Here are some tips for building a shelter in a wilderness setting:
- Choose a suitable location: Look for a spot that provides protection from wind, rain, and sun, and has adequate water and firewood nearby.
- Use natural materials: Gather materials such as branches, leaves, grass, mud, and stones to build your shelter.
- Know the different types of shelter: Depending on your environment and the materials available, you can build a variety of shelters, such as a lean-to, a debris hut, or a wigwam.
- Build a sturdy frame: Create a frame using branches or poles, and secure them together with cordage made from natural fibers.
- Insulate the shelter: Use leaves, grass, or other natural materials to insulate the shelter and provide warmth and comfort.
- Cover the shelter: Use branches, leaves, or bark to cover the shelter and protect it from the elements.
- Consider the door: Build a door that provides access to the shelter and can be easily closed for privacy and warmth.
Building a shelter without modern tools and equipment requires a combination of skills, including knot-tying, carving, and fire-starting. It’s important to have a basic understanding of these skills and to practice them before venturing into the wilderness. By building a shelter, you can protect yourself from the elements and increase your chances of survival in a wilderness setting.
The type of shelter that is best to build depends on the environment, weather conditions, available resources, and personal preferences. Here are some common types of shelters and when they might be suitable:
- Lean-to: A lean-to shelter is made by leaning branches or poles against a support, such as a tree or a rock. This type of shelter is simple to construct and provides protection from the wind and rain.
- Debris hut: A debris hut is made by creating a frame from branches and covering it with a layer of leaves, grass, or other natural materials. This type of shelter provides insulation and can keep you warm in colder weather.
- Teepee: A teepee shelter is made by placing several long poles in a circle and securing them together at the top. The sides are then covered with fabric, animal hides, or other materials. This type of shelter provides ventilation and can be easily heated with a fire.
- A-frame shelter: An A-frame shelter is made by creating a frame with two long poles and a crossbar, then covering it with a tarp, a poncho, or other waterproof material. This type of shelter is easy to construct and provides protection from the elements.
When building a shelter, it’s important to take into account the materials available, the weather conditions, and the time and energy available. It’s also important to make sure the shelter is sturdy, safe, and provides protection from the elements.
Navigation (without modern tools)
Navigation without modern tools can be challenging but essential in a survival situation. Here are some methods for navigation using natural tools:
- Sun: The sun can be used to determine direction. In the Northern Hemisphere, the sun rises in the east and sets in the west. By observing the position of the sun in the sky, you can determine approximate direction.
- Stars: At night, the stars can be used to determine direction. The North Star, also known as Polaris, is located near the North Pole and can be used to determine true north.
- Moon: The moon can also be used for navigation. By observing the position of the moon in the sky, you can determine approximate direction.
- Natural landmarks: Look for natural landmarks, such as mountains, rivers, or rock formations, to help guide your way.
- Maps and compasses: If you have access to a map and compass, they can be useful tools for navigation. Be sure to learn how to use a compass before relying on it for navigation.
- Shadow stick: A shadow stick can be used to determine the direction of the sun. Simply place a stick in the ground and mark the end of the shadow. Wait a short time, and mark the end of the shadow again. The line between the two marks will point east to west.
It’s important to remember that navigation without modern tools requires practice and experience. Be sure to have a basic understanding of these methods and practice them before venturing into the wilderness. By using these natural tools, you can navigate your way to safety in a survival situation.
First aid and basic medical treatment
Providing first aid and basic medical treatment is essential in a survival situation. Here are some basic steps for providing first aid and medical treatment:
- Assess the situation: Evaluate the situation and make sure the area is safe before providing first aid.
- Call for help: If possible, call for help or seek assistance from someone with medical training.
- Stop any bleeding: Apply pressure to any wounds to stop bleeding. Elevate the affected area if possible.
- Treat for shock: If the person is in shock, have them lie down and cover them with a blanket or warm clothing to keep them warm.
- Treat for burns: If someone has a burn, cool the affected area with cool water or a cool compress.
- Immobilize injuries: If someone has a suspected broken bone or other injury, immobilize the affected area to prevent further injury.
- Treat for dehydration: If someone is dehydrated, have them drink water or other fluids to rehydrate.
- Monitor vital signs: Monitor the person’s breathing, pulse, and other vital signs, and seek professional medical assistance if necessary.
It’s important to have a basic understanding of first aid and medical treatment before venturing into the wilderness. Be sure to pack a first aid kit with basic supplies such as bandages, antiseptics, and pain relievers. Also, consider taking a first aid or wilderness medicine course to learn more advanced techniques. By being prepared and knowledgeable, you can provide essential medical treatment in a survival situation.
When stockpiling for first aid and medical treatment, it’s important to consider the specific needs of the individuals and the environment. Here are some basic items to consider for a first aid kit:
- Bandages: A variety of bandages, including adhesive bandages, gauze pads, and adhesive tape, for treating cuts and wounds.
- Antiseptics: Antiseptic wipes, hydrogen peroxide, and alcohol swabs for cleaning wounds and preventing infection.
- Pain relievers: Over-the-counter pain relievers, such as acetaminophen or ibuprofen, for relieving pain and reducing fever.
- Medications: Any prescription medications needed by individuals in the group.
- Antibiotics: Antibiotics, if prescribed by a doctor or other medical professional, for treating infections.
- Medical supplies: Scissors, tweezers, and disposable gloves for administering first aid.
- Emergency blanket: A lightweight, space-saving blanket for treating shock and keeping individuals warm.
- Hand sanitizer: To maintain good hygiene and prevent the spread of infection.
- Sunscreen: To protect skin from sunburn.
- Insect repellent: To prevent bites from mosquitoes and other insects.
It’s also important to periodically check and replace items in the first aid kit to ensure that they are not expired and are still effective. In addition to these items, consider taking a first aid or wilderness medicine course to learn more advanced techniques for treating injuries and illnesses in a survival situation.
Self-defense survival skills
Preparing for self-defense in a survival situation is important to protect oneself from potential danger. Here are some steps to take when preparing for self-defense:
- Train in self-defense: Consider taking a self-defense class to learn techniques for defending oneself against physical attacks.
- Carry self-defense tools: Depending on local laws and regulations, consider carrying self-defense tools such as pepper spray, a pocket knife, or a personal alarm.
- Stay aware of surroundings: Be aware of the surroundings and potential danger, and avoid dangerous areas if possible.
- Avoid confrontation: If confronted with a potentially dangerous situation, avoid confrontation if possible and attempt to escape.
- Stay calm: In a self-defense situation, staying calm and composed can help you make clear decisions and take effective action.
- Have a plan: Develop a plan for self-defense and practice it regularly to increase your chances of success.
- Know local laws: Be aware of local laws and regulations related to self-defense and the use of self-defense tools.
It’s important to remember that self-defense should be a last resort in a survival situation. Avoiding dangerous situations and being aware of potential danger can often be the best method of self-protection. By taking steps to prepare for self-defense, you can increase your chances of staying safe in a survival situation.
Making a bow and arrows can be a useful skill in a survival situation for hunting and self-defense. Here are some basic steps for making a bow and arrows:
- Select the wood: Choose a strong and flexible wood for the bow, such as yew, hickory, or ash. Look for a straight and relatively knot-free branch that is approximately the same height as you.
- Cut the wood: Cut the wood to the desired length for the bow. The length should be about the same height as you. Use a knife, saw, or other cutting tool.
- Shape the bow: Use a knife or other cutting tool to shape the bow, thinning it out and shaping the ends to form the limbs.
- String the bow: Use a strong and flexible cord, such as sinew or nylon, to string the bow. Tie the cord securely to the notches at each end of the bow.
- Make arrows: Cut straight, slender branches or shoots for the arrows. The length should be approximately the distance from your armpit to your fingertips. Shape one end of each arrow to form a point.
- Fletch the arrows: Use feathers, leaves, or other materials to fletch the arrows. Fletching helps the arrows fly straight. Use glue or cord to secure the fletching to the arrows.
- Make arrowheads: Use a sharp stone, glass, or metal to make arrowheads. Attach the arrowheads to the pointed end of each arrow with glue or cord.
It’s important to note that making a bow and arrows requires some skill and practice. Be sure to take safety precautions when using sharp tools, and consider taking a course or learning from an experienced person to improve your technique. By making a bow and arrows, you can increase your chances of hunting and self-defense in a survival situation.
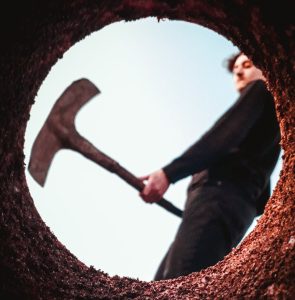
Tool making and maintenance
Tool making and maintenance is an essential survival skill that can help you repair and maintain your equipment in a wilderness setting. Here are some basic steps for tool making and maintenance:
- Identify the need: Identify which tools need repair or replacement, and determine what materials and tools are needed for the job.
- Gather materials: Gather materials such as wood, stone, metal, or other natural materials to use for repairs or replacements.
- Use appropriate tools: Use appropriate tools such as knives, saws, files, or other cutting and shaping tools to create or repair the tools.
- Practice safe techniques: Practice safe techniques when using tools, and take appropriate safety precautions such as wearing eye protection and using gloves.
- Sharpen tools: Keep cutting tools such as knives and axes sharp by using a sharpening stone or other sharpening tool.
- Lubricate and protect tools: Lubricate metal tools with oil or grease to prevent rust and corrosion, and protect wood tools with a coating of oil or wax.
- Store tools properly: Store tools in a dry and protected location, and keep them organized for easy access.
By learning tool making and maintenance, you can increase the lifespan and effectiveness of your equipment, and be better prepared for survival situations. Practice these skills regularly, and consider taking a course or learning from an experienced person to improve your techniques.
Clothing and blanket making
Making clothing and blankets can be an important survival skill, providing warmth and protection from the elements. Here are some basic steps for making clothing and blankets:
- Gather materials: Gather materials such as animal hides, fur, wool, or other natural materials to use for clothing and blankets.
- Process materials: Process the materials by cleaning, tanning, or shearing, as needed.
- Cut and shape: Cut and shape the materials into the desired size and shape for the clothing or blanket.
- Sew or tie: Sew or tie the pieces together using a needle and thread, or by tying the pieces together with cord or sinew.
- Add insulation: For extra warmth, add insulation such as fur or down to the clothing or blanket.
- Customize for fit: Customize the clothing or blanket for fit by making adjustments or adding straps or closures as needed.
- Maintain and repair: Maintain and repair the clothing and blankets as needed to increase their lifespan.
It’s important to note that making clothing and blankets requires some skill and practice. Be sure to take safety precautions when using sharp tools and handling animal hides, and consider taking a course or learning from an experienced person to improve your technique. By making your own clothing and blankets, you can increase your chances of staying warm and protected in a survival situation.
Tanning leather is a process of turning raw animal hides into durable and usable leather. Here are the basic steps to tan leather:
- Prepare the hide: Start by cleaning the hide to remove any flesh, fat, or other debris. Then soak the hide in water to remove salt or other chemicals used in the preservation process.
- Remove the hair: Use a scraper or knife to remove the hair from the hide. This process is called “fleshing.”
- De-flesh the hide: Scrape the flesh side of the hide to remove any remaining tissue or fat. This is a crucial step in preventing the hide from spoiling during the tanning process.
- Apply a tanning solution: There are different tanning solutions available, such as vegetable tanning, mineral tanning, or synthetic tanning. Choose a solution based on the type of leather you want to make and follow the manufacturer’s instructions.
- Work the hide: Once the tanning solution has been applied, the hide needs to be worked to make it soft and pliable. This process can include stretching, rolling, and kneading the hide.
- Drying and finishing: After the hide is worked, it needs to be dried and finished. This can include cutting the hide into the desired size and shape, and applying any additional treatments such as oiling or dying.

It’s important to note that tanning leather is a complex process that requires some skill and experience. Consider taking a course or learning from an experienced person before attempting to tan leather on your own. By tanning your own leather, you can create durable and usable material for clothing, shelter, and other survival needs.
Vegetable tanning is a natural and eco-friendly method of tanning leather that uses plant materials and natural substances. Here are some common chemicals used in the vegetable tanning process:
- Tannins: Tannins are natural substances found in bark, leaves, and fruit that bind with the proteins in the hide to create a durable and long-lasting leather. Common sources of tannins include oak bark, mimosa, and quebracho.
- Alum: Alum is a natural mineral salt that is used to help set the tannins and create a consistent texture and color in the leather.
- Salt: Salt is used to help preserve the hides before tanning, and to help remove any residual tannins from the leather.
- Bicarbonate of soda: Bicarbonate of soda is used to neutralize the pH of the hides after tanning, and to help remove any residual tannins.
- Natural oils: Natural oils such as neatsfoot oil, jojoba oil, or olive oil can be used to condition and finish the leather after tanning.
It’s important to note that the specific chemicals used in vegetable tanning can vary depending on the tannery and the type of leather being produced. Additionally, the process of vegetable tanning is time-consuming and can take several weeks to complete. By using natural and eco-friendly methods, vegetable tanning can produce high-quality and sustainable leather that can be used for clothing, footwear, and other survival needs.
Communication survival skills
Communication skills are important in any situation, including survival situations. Here are some communication skills that can be useful in a survival situation:
- Active listening: Active listening is a skill that involves listening to others with the intent to understand their point of view. In a survival situation, active listening can help to improve communication and understanding among group members.
- Clear and concise speaking: When speaking, it’s important to be clear and concise in order to convey information effectively. This can help prevent misunderstandings and ensure that important information is communicated clearly.
- Nonverbal communication: Nonverbal communication, such as facial expressions, body language, and tone of voice, can convey a lot of information and can be just as important as spoken communication in a survival situation.
- Conflict resolution: In a survival situation, conflicts can arise. Having the ability to resolve conflicts effectively can help to maintain a positive and productive group dynamic.
- Assertiveness: Assertiveness is the ability to express one’s opinions and needs in a clear and direct manner. This can help to ensure that important concerns are heard and addressed.
- Flexibility: In a survival situation, plans can change quickly. Being flexible and open to new ideas and solutions can help to improve communication and problem-solving among group members.
By developing these communication skills, you can improve your ability to communicate effectively in a survival situation, and work together with others to increase your chances of survival.
A crystal radio is a simple radio that can be made from basic components and requires no external power source. Here are the basic steps for making a crystal radio:
- Gather the components: Gather components such as a diode, a capacitor, a coil of wire, and a pair of headphones.
- Build the coil: Build a coil of wire by wrapping a long length of copper wire around a cardboard tube, such as a toilet paper tube, in a spiral pattern. The coil should have a certain number of turns to tune in to the desired frequency.
- Add the diode and capacitor: Connect the diode and capacitor to the coil. The diode should be connected to the end of the coil, and the capacitor should be connected between the diode and the ground.
- Connect the headphones: Connect the headphones to the diode and the ground. The headphones will convert the radio signals into sound.
- Adjust and tune: Adjust the capacitor to tune in to the desired frequency, and adjust the position of the coil to improve reception.
A crystal radio is a basic but effective radio that can be used to receive AM radio signals. While it is simple to build, it can be challenging to tune in to specific stations and may have limited range. Nonetheless, making a crystal radio can be a fun and educational project that can help you learn more about electronics and radio technology.
Stress management and mental toughness
Stress management and mental toughness are important skills to have in a survival situation. Here are some tips for managing stress and building mental toughness:
- Stay focused on the present moment: In a survival situation, it’s important to focus on the present moment and avoid dwelling on past mistakes or worrying about the future.
- Develop a positive attitude: Maintaining a positive attitude can help you stay focused and motivated, even in difficult circumstances.
- Practice mindfulness: Mindfulness is the practice of being fully present and aware of your thoughts and feelings without judgment. Mindfulness can help to reduce stress and increase mental resilience.
- Stay physically active: Regular exercise can help to reduce stress and improve mental health.
- Practice relaxation techniques: Techniques such as deep breathing, meditation, or yoga can help to reduce stress and promote mental well-being.
- Connect with others: Having a support network of family, friends, or fellow survivors can provide emotional support and help to reduce stress.
- Learn from experience: Use the challenges and experiences of survival situations to learn and grow, and develop mental toughness and resilience.
By practicing these tips, you can improve your ability to manage stress and maintain mental toughness in a survival situation. Remember to take care of yourself both physically and mentally, and to seek help if you need it.
Energy conservation and resource management
Energy conservation and resource management are important skills to have in a survival situation, where resources may be scarce. Here are some tips for conserving energy and managing resources:
- Prioritize your needs: Identify your basic needs for survival, such as water, food, and shelter, and prioritize your efforts towards meeting those needs.
- Use resources efficiently: Use resources efficiently and avoid wasting water, food, and other supplies.
- Minimize energy use: Minimize energy use by using natural light, turning off electronics when not in use, and using energy-efficient lighting and appliances.
- Use renewable resources: Use renewable resources, such as solar power, wind power, or hydro power, to reduce your reliance on non-renewable resources.
- Reuse and recycle: Reuse and recycle materials whenever possible to reduce waste and conserve resources.
- Practice sustainable agriculture: Use sustainable agriculture techniques such as composting, crop rotation, and natural pest control to conserve soil, water, and other resources.
- Learn basic survival skills: Learn basic survival skills such as hunting, fishing, foraging, and plant identification to reduce your reliance on external resources.
By practicing these tips, you can improve your ability to conserve energy and manage resources in a survival situation. Remember to use resources wisely and efficiently, and to prioritize your needs for survival.

Wind and sun can be utilized in various ways for survival in a survival situation. Here are some ways that wind and sun can be used:
- Wind power: Wind turbines can be used to generate electricity to power lights, radios, and other electronics. Windmills can also be used to pump water from wells or other sources.
Building a wind turbine with few tools can be a challenging task, but it is possible with some basic knowledge and creativity. Here are the basic steps for building a wind turbine with few tools:
Gather materials: You will need a generator, a rotor, a tower, a battery, and some basic tools, such as pliers, wire cutters, and screwdrivers.

Build the rotor: The rotor is the part of the turbine that captures the wind and converts it into mechanical energy. The rotor can be built from PVC pipe, plywood, or other lightweight materials. You will need to cut and shape the rotor blades to a specific size and angle to optimize wind capture.
Build the tower: The tower can be made from steel or wood, depending on what materials are available. You will need to construct a stable base and attach the rotor to the top of the tower.
Connect the generator: The generator is what converts the mechanical energy from the rotor into electrical energy. You will need to connect the generator to the rotor and mount it securely to the tower.
Connect the battery: The battery is what stores the electrical energy generated by the turbine. You will need to connect the battery to the generator and use a charge controller to regulate the flow of energy.
By following these steps and using basic tools, you can build a simple wind turbine that can generate electricity from the wind. It’s important to remember that building a wind turbine requires some knowledge of electrical and mechanical systems, and can be dangerous if not done properly. Consider working with an experienced person or taking a course before attempting to build a wind turbine on your own.
Solar power: Solar panels can be used to generate electricity from sunlight to power lights, radios, and other electronics. Solar ovens can be used to cook food, and solar water heaters can be used to heat water.
If you don’t have access to a store to buy solar panels, there are still ways to harness solar power using basic materials that can be found or repurposed. Here are a few ideas for using solar power with no access to solar panels:
Solar oven: A solar oven can be made using cardboard boxes, aluminum foil, and a piece of glass or clear plastic. The oven works by concentrating the sun’s rays onto the food, allowing it to cook without the need for electricity or gas.
Solar water heater: A solar water heater can be made using black tubing or hose, which absorbs heat from the sun and heats up the water. The heated water can then be used for cooking, cleaning, or bathing.
Solar still: A solar still can be made using plastic sheeting, a container, and a collection cup. The still works by evaporating water using the sun’s heat, and then collecting the condensed water in the collection cup.
Solar-powered lights: Solar-powered lights can be made using small solar cells and rechargeable batteries. The cells can be salvaged from discarded electronics, and the batteries can be charged using the cells and used to power LED lights.
By using these simple ideas, you can harness the power of the sun without the need for expensive solar panels or other specialized equipment. Remember to be creative and resourceful, and to make the most of the materials you have available.
Air-drying: Clothes, food, and other items can be air-dried in windy and sunny conditions, reducing the need for electricity or gas-powered dryers.
Cooling: Wind and shade can be used to cool down living spaces, reducing the need for air conditioning.
Navigation: Wind direction and sun position can be used for navigation when traveling on foot or by boat.
Signal for help: Reflective surfaces, mirrors, or other shiny objects can be used to reflect sunlight to signal for help.
By utilizing wind and sun, you can reduce your reliance on external sources of power and resources, and increase your chances of survival in a survival situation. Remember to use these resources safely and efficiently, and to take advantage of opportunities for renewable energy and sustainable living.
Teamwork and leadership
Teamwork and leadership are crucial for survival in any situation, especially in a survival situation where resources and supplies may be limited. Here are some ways in which teamwork and leadership can help in a survival situation:
- Division of labor: Effective teamwork allows individuals to divide tasks based on their strengths and abilities, allowing each member to contribute in a meaningful way.
- Improved problem-solving: A group of people working together can bring a diversity of perspectives and approaches to problem-solving, increasing the chances of finding effective solutions to challenges.
- Enhanced safety: In a survival situation, safety is a top priority. By working together, group members can keep each other safe and reduce the risk of accidents or injury.
- Improved morale: In a stressful situation, a positive attitude can make a big difference in maintaining mental and emotional well-being. Good teamwork can help to maintain positive morale and keep group members motivated.
- Improved communication: Clear and effective communication is essential in a survival situation. Effective teamwork encourages open communication, allowing group members to share information and stay informed.
- Strong leadership: Effective leadership can provide direction and guidance in a survival situation, helping group members to work together and achieve common goals.
In a survival situation, teamwork and leadership are essential for building trust, communication, and coordination. They can help to create a sense of unity and purpose, which can increase the chances of survival for the group.
Negotiation and conflict resolution
Negotiation and conflict resolution skills are important for survival in a survival situation. Here are some ways in which these skills can help in a survival situation:
- Resource allocation: In a survival situation, resources may be scarce, and conflicts may arise over the allocation of resources. Negotiation and conflict resolution skills can help to mediate disputes and find fair solutions.
- Group dynamics: Living in a group in a survival situation can be challenging, and conflicts may arise due to personality clashes or differences in opinion. Negotiation and conflict resolution skills can help to address these conflicts and maintain positive group dynamics.
- Problem-solving: Effective problem-solving often requires negotiation and conflict resolution skills. By bringing diverse perspectives and ideas to the table, group members can work together to find creative solutions to challenges.
- Safety: In a survival situation, safety is a top priority. By using negotiation and conflict resolution skills, group members can work together to address safety concerns and prevent accidents or injuries.
- Communication: Clear and effective communication is essential in a survival situation, especially when dealing with conflicts or disputes. Negotiation and conflict resolution skills can help to ensure that communication is productive and constructive.
In a survival situation, negotiation and conflict resolution skills can be essential for building trust, communication, and coordination. By working together and resolving conflicts effectively, group members can increase their chances of survival and build strong and resilient communities.
Problem-solving and critical thinking
Problem-solving and critical thinking skills are essential for survival in a survival situation. Here are some ways in which these skills can help in a survival situation:
- Resource management: In a survival situation, resources are often scarce, and effective problem-solving and critical thinking skills can help to manage resources effectively and use them efficiently.
- Adaptation: In a survival situation, circumstances can change quickly and unexpectedly. Effective problem-solving and critical thinking skills can help individuals and groups adapt to new situations and find creative solutions to unexpected challenges.
- Safety: In a survival situation, safety is a top priority. Effective problem-solving and critical thinking skills can help to identify potential safety hazards and find ways to prevent accidents or injuries.
- Decision-making: Effective problem-solving and critical thinking skills can help individuals and groups make informed decisions based on available information, reducing the risk of making dangerous or costly mistakes.
- Innovation: In a survival situation, innovation and creativity can be essential for finding new ways to survive and thrive. Problem-solving and critical thinking skills can help individuals and groups think outside the box and find new solutions to old problems.
In a survival situation, problem-solving and critical thinking skills can be essential for building resilience, adaptability, and innovation. By using these skills effectively, individuals and groups can increase their chances of survival and thrive in challenging circumstances.
Adaptability and flexibility
Adaptability and flexibility are essential skills for survival in any situation, especially in a survival situation where circumstances can change quickly and unexpectedly. Here are some ways in which adaptability and flexibility can help us survive:
- Change in resources: In a survival situation, resources can be scarce, and individuals may need to adapt to new sources of food, water, or shelter. Adaptability and flexibility can help individuals identify new resources and find new ways to survive.
- Change in environment: In a survival situation, individuals may need to adapt to different climates or terrains, such as deserts, forests, or mountains. Adaptability and flexibility can help individuals adjust to new environments and find new ways to survive.
- Change in circumstances: In a survival situation, circumstances can change quickly and unexpectedly. Adaptability and flexibility can help individuals adjust to new situations and find new solutions to unexpected challenges.
- Change in social dynamics: In a survival situation, individuals may need to form new social groups or adjust to new social dynamics. Adaptability and flexibility can help individuals build relationships and navigate social dynamics in a way that promotes cooperation and survival.
- Change in priorities: In a survival situation, priorities may shift, and individuals may need to adapt to new goals or objectives. Adaptability and flexibility can help individuals adjust to changing priorities and focus on what is most important for survival.
In a survival situation, adaptability and flexibility can be essential for building resilience and thriving in challenging circumstances. By using these skills effectively, individuals can increase their chances of survival and maintain a positive attitude even in the face of adversity.
Knowledge of edible plants and toxic substances
Getting knowledge of edible plants and toxic substances can be critical for survival in a wilderness or emergency situation. Here are some ways you can gain this knowledge:
- Research and study: There are many books and online resources that provide information on edible plants and toxic substances. You can start by researching and studying the plants and substances that are common in your area.
- Local experts: Seek out local experts, such as park rangers, botanists, or foraging groups, who can provide information on local plants and substances. They can also show you how to identify and prepare edible plants safely.
- Hands-on experience: Learning from experience is one of the most effective ways to gain knowledge of edible plants and toxic substances. You can start by identifying common plants and substances, and testing them in small quantities to see how your body reacts.
- Online courses: There are many online courses and training programs that teach identification and preparation of edible plants and toxic substances.
- Join a local foraging group: Joining a local foraging group or survival group can provide you with hands-on experience and the opportunity to learn from others who are knowledgeable in this area.
Remember, before consuming any plant or substance, it is important to properly identify it and test it in small quantities to ensure it is safe to eat. Always be cautious and seek out expert advice if you are unsure about a particular plant or substance.

Here are five books on knowledge of edible plants and toxic substances that you can purchase online:
- “Edible Wild Plants: A North American Field Guide” by Thomas S. Elias and Peter A. Dykeman – This book provides detailed descriptions and illustrations of more than 200 common edible plants in North America. Available on Amazon and Barnes & Noble.
- “The Forager’s Harvest: A Guide to Identifying, Harvesting, and Preparing Edible Wild Plants” by Samuel Thayer – This book provides in-depth information on how to identify and prepare wild edible plants. Available on Amazon and Barnes & Noble.
- “Wild Edibles: A Practical Guide to Foraging, with Easy Identification of 60 Edible Plants and 67 Recipes” by Sergei Boutenko – This book is a practical guide to foraging and includes recipes for preparing edible plants. Available on Amazon and Barnes & Noble.
- “The Complete Guide to Edible Wild Plants, Mushrooms, Fruits, and Nuts: How to Find, Identify, and Cook Them” by Katie Letcher Lyle – This book provides a comprehensive guide to identifying and preparing wild edible plants, mushrooms, fruits, and nuts. Available on Amazon and Barnes & Noble.
- “The Handbook of Edible Weeds” by James A. Duke – This book provides information on more than 100 common edible weeds and includes recipes for preparing them. Available on Amazon and Barnes & Noble.
Note that it is important to cross-check the information in any book with multiple sources to ensure accuracy before consuming any plant or substance in the wild.
Orienteering and mapping skills
Orienteering and mapping skills can be learned through a variety of resources and programs. Here are some ways to acquire these skills:
- Online resources: There are many online resources that offer free or low-cost courses in orienteering and map reading. Some examples include Orienteering USA and the National Park Service.
- Outdoor recreation clubs: Joining an outdoor recreation club or group can provide an opportunity to learn orienteering and mapping skills from experienced members. These clubs often offer workshops and training sessions.
- Wilderness schools: Many wilderness schools offer courses in orienteering and map reading. These schools typically provide hands-on instruction and practice in the field.
- Scouting organizations: Scouting organizations, such as the Boy Scouts of America and Girl Scouts of the USA, often offer merit badges or other programs in orienteering and map reading.
- Local parks and recreation departments: Many local parks and recreation departments offer courses and workshops in orienteering and map reading.
Remember, orienteering and map reading skills are best learned through hands-on practice and experience. Be sure to practice your skills in a safe and controlled environment before applying them in a wilderness or survival situation.
Here are five books that can help with orienteering and map reading skills:
- “Be Expert with Map and Compass” by Bjorn Kjellstrom – This book is a classic guide to orienteering and map reading, providing detailed instruction and exercises for beginners and advanced orienteers alike. Available on Amazon and Barnes & Noble.
- “The Essential Wilderness Navigator: How to Find Your Way in the Great Outdoors” by David Seidman – This book provides a comprehensive guide to navigation in the wilderness, covering map reading, compass use, and GPS navigation. Available on Amazon and Barnes & Noble.
- “Map Reading and Land Navigation: FM 3-25.26” by U.S. Army – This field manual provides comprehensive instruction on map reading and land navigation, as taught by the U.S. Army. Available on Amazon and Barnes & Noble.
- “The Complete Idiot’s Guide to Backpacking and Hiking” by Jason Stevenson – This book provides a beginner’s guide to backpacking and hiking, covering orienteering and map reading, as well as other essential skills. Available on Amazon and Barnes & Noble.
- “Wilderness Navigation: Finding Your Way Using Map, Compass, Altimeter & GPS” by Bob Burns and Mike Burns – This book provides a comprehensive guide to navigation in the wilderness, covering map reading, compass use, and GPS navigation. Available on Amazon and Barnes & Noble.
These books are available for purchase online on Amazon and Barnes & Noble. Remember that reading and studying can only take you so far, and it is important to practice your orienteering and map reading skills in the field.
Basic blacksmithing and metalworking
Learning basic blacksmithing and metalworking skills can be done through a variety of resources and programs. Here are some ways to acquire these skills:
- Community colleges and vocational schools: Many community colleges and vocational schools offer courses in blacksmithing and metalworking. These courses often provide hands-on instruction in a well-equipped workshop or forge.
- Art schools and studios: Many art schools and studios offer courses and workshops in blacksmithing and metalworking, which can be an opportunity to learn from experienced artisans.
- Online resources: There are many online resources that offer free or low-cost courses and tutorials in blacksmithing and metalworking. Some examples include the Artist Blacksmith Association of North America and the Online Blacksmith School.
- Apprenticeships and mentorships: Some experienced blacksmiths and metalworkers offer apprenticeships or mentorships, which can provide hands-on instruction and valuable experience.
- Books and instructional videos: There are many books and instructional videos available on blacksmithing and metalworking, which can provide valuable information and instruction.
Remember, learning blacksmithing and metalworking skills requires practice and experience. It is important to practice safety procedures and use the proper equipment when working with metal. Start with simple projects and work your way up to more complex ones as your skills improve.
Here are five resources you can use to learn basic blacksmithing and metalworking:
- “The Complete Modern Blacksmith” by Alexander Weygers – This book provides comprehensive instruction on blacksmithing and metalworking, covering everything from basic techniques to advanced projects. Available on Amazon and Barnes & Noble.
- “The Backyard Blacksmith: Traditional Techniques for the Modern Smith” by Lorelei Sims – This book provides a beginner’s guide to blacksmithing and metalworking, with step-by-step instructions and projects for beginners. Available on Amazon and Barnes & Noble.
- The Online Blacksmith School – This website offers online courses and tutorials in blacksmithing and metalworking, covering a range of techniques and projects. Available on their website.
- Artist Blacksmith Association of North America – This organization offers resources and information on blacksmithing and metalworking, including workshops, courses, and events. Available on their website.
- YouTube – There are many instructional videos available on YouTube that cover blacksmithing and metalworking techniques, projects, and safety procedures. Some popular channels include Black Bear Forge and Alec Steele.
Animal husbandry and farming skills
Learning animal husbandry and farming skills can be done through a variety of resources and programs. Here are some ways to acquire these skills:
- Local farming organizations: Many farming organizations offer courses and workshops on animal husbandry and farming skills. These organizations often provide hands-on instruction from experienced farmers.
- Agricultural colleges and universities: Many colleges and universities offer courses in animal husbandry and farming skills, often with access to a working farm for hands-on learning.
- Online resources: There are many online resources that offer free or low-cost courses and tutorials in animal husbandry and farming skills. Some examples include the National Sustainable Agriculture Information Service and the Sustainable Agriculture Research and Education program.
- Apprenticeships and internships: Some experienced farmers offer apprenticeships or internships, which can provide hands-on instruction and valuable experience.
- Books and instructional videos: There are many books and instructional videos available on animal husbandry and farming skills, which can provide valuable information and instruction.

Remember, learning animal husbandry and farming skills requires practice and experience. It is important to practice safety procedures and use the proper equipment when working with animals and farming equipment.
Here are five resources you can use to learn animal husbandry and farming skills:
- “The Small-Scale Poultry Flock: An All-Natural Approach to Raising Chickens and Other Fowl for Home and Market Growers” by Harvey Ussery – This book provides comprehensive instruction on raising and caring for small-scale poultry flocks. Available on Amazon and Barnes & Noble.
- “Storey’s Guide to Raising Chickens: Breed Selection, Facilities, Feeding, Health Care, Managing Layers & Meat Birds” by Gail Damerow – This book provides detailed information on raising chickens, from breed selection to health care. Available on Amazon and Barnes & Noble.
- National Sustainable Agriculture Information Service – This organization offers resources and information on sustainable agriculture, including animal husbandry and farming skills. Available on their website.
- The Farm School – This organization offers a Farmer Training Program, which provides hands-on instruction and experience in animal husbandry and farming skills. Available on their website.
- YouTube – There are many instructional videos available on YouTube that cover animal husbandry and farming techniques, such as Joel Salatin’s Polyface Farm channel.
Conclusion
In conclusion, survival skills are essential for anyone who wants to be prepared for the worst-case scenarios. This includes skills like water procurement, shelter construction, food procurement, navigation, first aid, and self-defense. While it’s important to learn these skills through hands-on experience and training, there are also many resources available, including books, online courses, and workshops.
Orienteering and mapping skills are also essential in a survival situation, and can be learned through community colleges and vocational schools, online resources, and apprenticeships or mentorships. Animal husbandry and farming skills are important for those who want to live off the land, and can be learned through local farming organizations, agricultural colleges and universities, and online resources.
It’s important to remember that learning survival skills takes time, practice, and dedication, but the knowledge and experience gained can be invaluable in a time of crisis.
Here are some books that can help prepare for living in a survival mode and where to purchase them:
- “SAS Survival Handbook” by John Wiseman – This book can be purchased on Amazon or Barnes & Noble.
- “The Ultimate Guide to Wilderness Living” by John McPherson – This book can be purchased on Amazon or Barnes & Noble.
- “The Self-Sufficient Life and How to Live It” by John Seymour – This book can be purchased on Amazon or Barnes & Noble.
- “When Technology Fails” by Matthew Stein – This book can be purchased on Amazon or Barnes & Noble.
- “The Forager’s Harvest” by Samuel Thayer – This book can be purchased on Amazon or Barnes & Noble.
- “The Complete Guide to Edible Wild Plants” by Department of the Army – This book can be purchased on Amazon or Barnes & Noble.
- “The Encyclopedia of Country Living” by Carla Emery – This book can be purchased on Amazon or Barnes & Noble.
- “The Prepper’s Blueprint” by Tess Pennington – This book can be purchased on Amazon or Barnes & Noble.
- The Ultimate Situational Survival Guide” by Robert Richardson – This book can be purchased on Amazon or Barnes & Noble.
- “Deep Survival” by Laurence Gonzales – This book can be purchased on Amazon or Barnes & Noble.
Remember that these books are just a starting point, and practical experience and hands-on training are also essential to preparing for living in a survival mode.